Coil building and wicking are practices preferred by users who have reached a professional level in electronic cigarettes. However, before wicking and building, you must obtain an ohm reader; do not attempt to build coils and wick without one. Once you have all the necessary materials, you can begin building.
What You Need for Coil Building
Coil building is a highly professional task, requiring all necessities to be met. Here's a list of materials you'll need:
- Ohm reader
- Your desired RDA
- Wire for building, Kanthal or Nichrome
- Small 2 mm screwdriver
- Additional small screwdriver or Allen key to fit RDA screws
- Small butane torch
- Ceramic-tipped tweezers
- Needle-nose pliers
- Small wire cutters
- Scissors
- Organic cotton
- E-liquid
- Patience and ample time
After obtaining all the materials listed above, you can now proceed with coil measurement and building. You can get all the materials on the list above with the Coil Master DIY Kit V3 .
Using an electronic cigarette may seem simple at first, but as you progress, you can learn the details and experience a more perfect enjoyment.
Wire Oxidation
First, you should start by cutting a piece of Kanthal wire. About 3 inches (8 cm) in length is ideal, but for beginners, a 13 cm wire would be better. Hold one end of the wire with tweezers or pliers and heat the Kanthal wire with a propane torch, moving the torch from underneath the wire until it turns orange. Wait 1 minute for your wire to cool down, then repeat the same process by holding the other end with tweezers. Wire oxidation is necessary for flexibility and ease of work.
Coil Wrapping
For coil wrapping, you need tweezers, a blue screwdriver, and wire. You must ensure the wire stays on the screwdriver and doesn't slip. Hold the end of the wire tightly on the screwdriver with your thumb. Wrap your wire around the screwdriver until you reach the goal of 8 wraps. Try to keep the coils close to each other so they don't overlap. Try to wrap them tightly without being loose.
After 8 turns of wrapping, both ends of the wire should be in the same direction. The reason for this is to make it easier to seat it on the deck. Check the number of wraps. Once the coils complete 8 turns, you can check the looseness and tightness by pushing the coil wire towards the screwdriver handle with the help of your fingers.
Coil Installation
Gently loosen and remove the screws on the posts where you will place your wrapped wire on the deck. Initially, it may be difficult to put the screws back in. Position the wrapped wire at the tip of the screwdriver exactly in the center over the deck.
Thread both ends of the wire through the wires on the post. Then tighten the screws in between. They shouldn't be too tight. Cut off any excess parts.
Coil OHM Measurement
Then, take the atomizer and attach it to the resistance reader; it should measure a value close to 1.2 ohms. It is quite normal for coils to have a + variance of up to 0.2 ohms in resistance. If it shows the appropriate resistance for the coil, + or 0.2 ohms, you can proceed to the next step.
If your ohm reader isn't reading your coil or is showing a greater deviation from your target resistance, it means there's a problem to fix.
- Ensure the RDA screws are tight
- Check to ensure no contact with the deck or posts
- Ensure the atomizer is fully screwed onto the ohm reader
After addressing these steps, you should move on to the next stage. If the problem persists after these adjustments, use another coil.
Coil Testing
After installing the coil in the RDA, combine it with the mod and perform a process called "glowing." Turn on the mod's temperature level and fire it to make the wire glow. Perform the glowing process from the center outwards towards the ends.
Coil Wicking
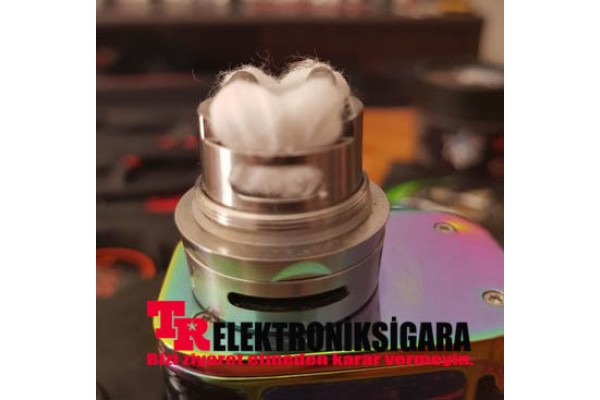
For an excellent flavor when using an electronic cigarette, you should use organic and high-quality cotton. A large piece of cotton is required to fit snugly inside your coil, leaving about half an inch (1.5 cm) on both sides in the same direction.
You should be very careful when cutting the cotton. Pull the cut cotton through the hole in the center of your coil to the other side. After fully threading your wick, do not completely cut off the parts outside the coil.
Drape the excess wick hanging from the bottom of the coil down towards the deck. Adjust the wick's length so it remains on the deck. This way, your cotton will absorb the e-liquid more efficiently.
Test It!
After installing your coils and wicking them, they might be slightly angled and the cotton tangled. Double-check the resistance on the ohm meter to ensure it hasn't changed by + or -.
You have successfully built a 1.2 ohm coil. Now all you need to do is enjoy the flavor with your electronic cigarette. You can also produce plenty of vapor with this process.